If you have a website, you’re missing out if you’re not split testing. This way you’ll know exactly what’s working and what’s not so you can optimise your website for maximum conversions and sales.
What is split testing?
Split testing, also known as A/B testing, allows you to compare two different versions of a website, a control version versus a variant. Then, you show these web pages to different segments of website visitors at the same time and compare which version produces more conversions.
For example, you want to see if a different homepage headline would result in more views and clicks would increase the conversion rate on your website. The original headline reads “Helping You Generate More Leads For Your Business Fast,” and the new version reads, “Want to Learn The Secrets to Generating More Leads?”.
After generating traffic to both, you find that the latter gets more clicks than the original. Since there’s only one difference between the two pages, you can be confident that the headline was the reason behind the change in performance.
Aside from the headline, here are other elements you can split test on your website:
- Call to Actions
- Descriptions
- Images
- Videos
- Section Backgrounds
- Order of Sections
- Section Visibility
- Button Text
- Arrangement of Content
- Colours
- Navigation Links
If you want to learn how split testing works, Google Optimize is an excellent tool for beginners.

What is Google Optimize?
Google Optimize is a free service from Google, so it’s perfect for small- to medium-sized businesses. It allows you to run up to 5 simultaneous split tests on your website.
Another advantage of using Google Optimize is it’s already integrated with other Google products. If you’re using Google Analytics, your data will be available in Google Optimize, and vice versa, allowing for more advanced targeting, reporting and conversion tracking. Google Optimize can also be linked to Google Ads, allowing you to personalise your existing web pages to target users who come from specific campaigns, ad groups and keywords.
If you’re sold on Google Optimize as a tool for you, let’s discuss the steps for setting it up on your website.
How to setup Optimize on your website (easy method)
Follow the steps below to set up a free Google Optimize account on your website.
- Now, to get started, ensure you’re using Google Chrome. Go to the Chrome Web Store and download this extension.
- Once the extension is downloaded, you’ll then need to go to https://optimize.google.com/ and create an account.
- After accepting the terms and conditions, you’ll then proceed to create a container for your website, just name it with the URL of your site.
- After creating the container, setup instructions will appear. You’ll be using Google Tag Manager to set up Optimize. If you haven’t already set up and installed Tag Manager, follow this guide.
- Go to your Tag Manager account. Select the container for the site you want to install Optimize on.
- Click Tags in the left sidebar, then select New. Call the tag something descriptive, such as “Google Optimize Tag”.
- Click Tag Configuration, then click Google Optimize in the panel that appears.
- Copy the Container ID from the Optimize container setup screen. It should look something like “OPT-ABC12EF”. Paste it into the Container ID field in the Tag Manager configuration screen.
- Click the Triggering panel. Select All Pages. Then select Save in the top right.
- In the top right of the Tag Manager window select Submit, then Publish.
- Optimize is now installed on your website!
- Open your Google Optimize account and select the container you’ve created.
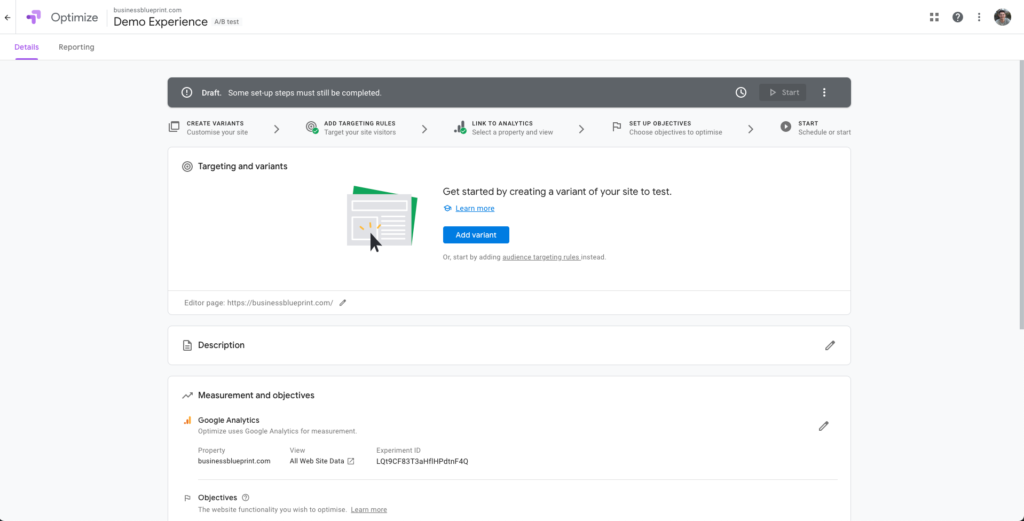
- Create a new experience and give it a descriptive name. We recommend putting the date in there too to make it easier to track experiments. Put in the URL of the page you’ll be running the experiment on.
Select A/B test as the experience type. - The experiment page will then appear. Select Add Variant.
- Give your new variant a descriptive name, such as “Alternate Header Graphic”. Then click Finished.
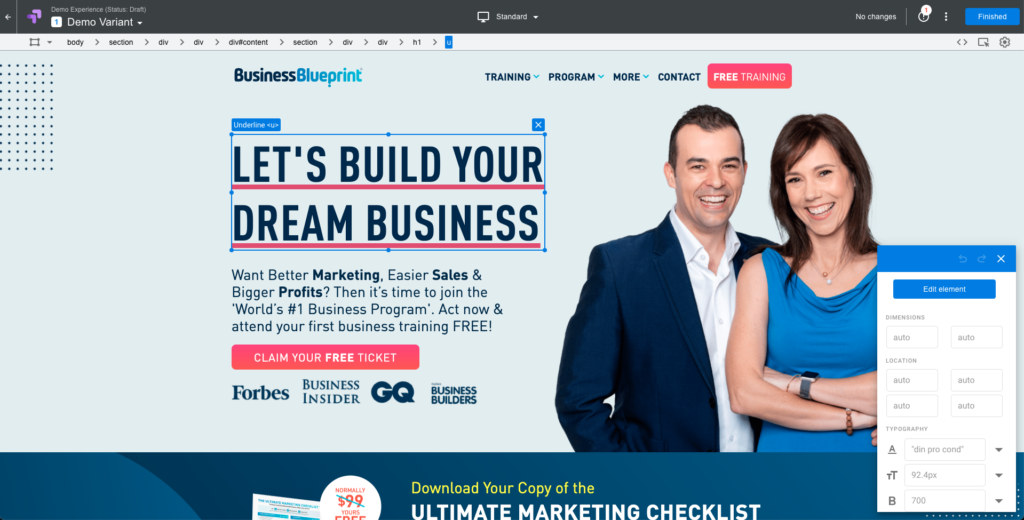
- Click the Edit button on your newly created variation. You can then use the visual editing tool to edit your website. Click on elements you want to change, then right-click to edit or remove text or image.
- When you’ve finished making your changes, click Finished in the top right. You’ll then be taken back to Google Optimize.
- Repeat the Add Variant process to continue adding different variations to the experiment. Remember that you should only be altering a single part of the website in an experiment, such as trying to find the best header graphic or headline.
- Once you’ve added all the variants, scroll down to the Measurement and Objectives section. Here you can add your Primary Objective and any Secondary Objectives. We recommend setting up a Goal in Google Analytics to track a key step you’d like your visitors to make. This could be registering for a free download, signing up to your email list or purchasing an item. By measuring Google Optimize experiments against these goals, you can gain deeper insight into how changes to your website impact your conversion rates.
- You’re now ready to start your experiment. Scroll to the top of the experiment page and select Start.

How to set up an Optimize experiment
Now that you’ve successfully set up Google Optimize, on to the fun stuff! Let’s create your very first split test.


How to determine the winner of your experiment
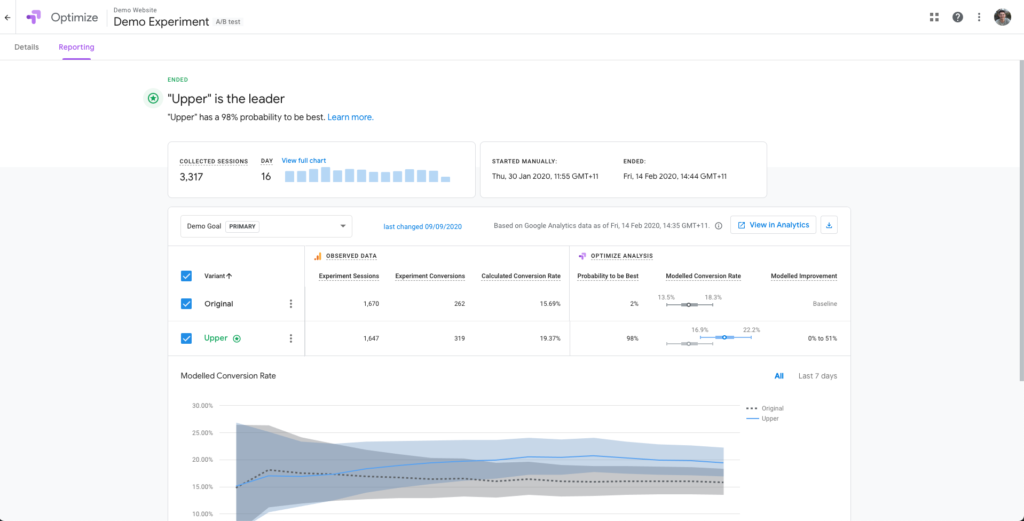
After setting up your experiment, you’ll need to leave it running for at least 2 weeks. While the experiment is running, you need to ensure the page is getting enough traffic (e.g. more than 50 visitors per day)
Then after running for enough time, the experiment should show either a winner at the top, that the experiment needs more time, or that no winner was found. If a clear winner was found, make that change to your website and publish your site live.
Summary
Whether you’re changing your headlines or button text, remember that small changes can have a huge impact. The more you use Google Optimize, the more you’ll realize why it’s important to split test your website. Then, let us know how your results are going in the comments below.


